
Make Willow Bark Cordage – by Bert Blancke
All members of the willow family have good inner bark for making cordage with. The best time to gather the bark is when the sap starts flowing in spring. Sometimes people find it hard to get nice and supple cordage from willow. They have to wet it before use to make the fibres flexible enough.
Method
This is my method for getting the maximum out of what willowbark has to offer:
Removing the bark:
1. Harvest a nice straight willow shoot with as few side branches and woody bits as possible.
Willows don’t mind having their branches cut. If you want, you can stick a couple in the ground and the chances are that some will shoot.
2. Cut a line down the length of the branch. If there are knots, or not so good spots, it’s a good idea to cut across them. That way they are not in the middle of the bark you collect.
3. It should now be rather easy to peel the bark away.
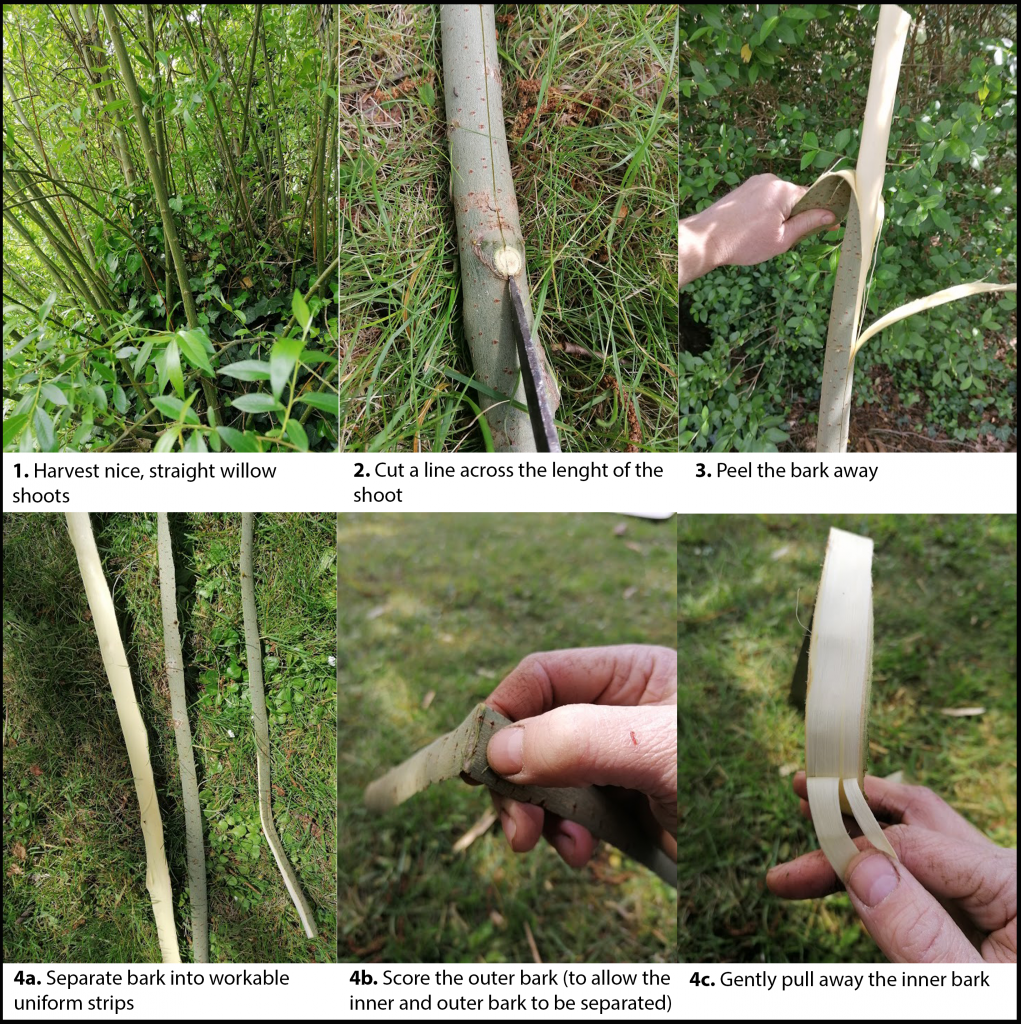
4. Now separate the bark into workable uniform strips. Next, you need to separate the inner from the outer bark. You could scrape the outer bark off when it is still attached to the wood. However, I’m not a fan of that method.
By simply scoring the outer bark and then gently pulling away the inner bark you get a much finer layer of inner bark. We only want the finest layer of inner bark that is closest to the wood.
5. Bundle all your inner bark together in a coil, but not too tightly.

Using a lye solution:
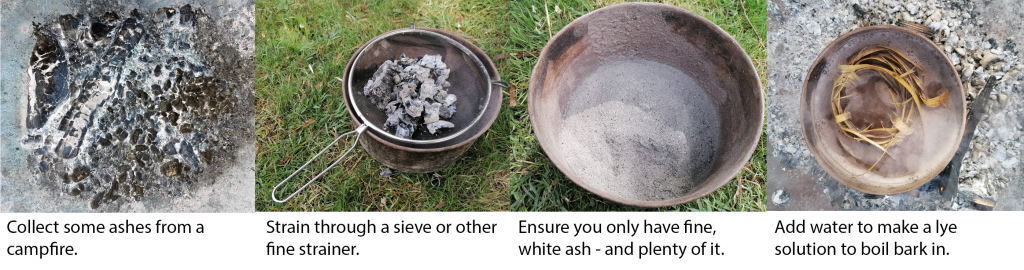
6. From a campfire gather a couple of scoops of ash and shift it through a strainer. You only want fine, white ash (a lot of it). By adding water, you make a lye solution to boil the bark in.
The idea is that you make a base (as opposed to an acid) that breaks down the fibres of the inner bark.
7. Bring the lye solution to a boil and then add the inner bark, as well as some of the outer bark (the tannins help to soften the fibers as well). I find it easiest to use a bed of hot coals and then add firewood when I need more heat. Like cooking anything, it is best to stay near and checking once in a while.
8. Cover with a lid and let it boil (rolling boil) for anything between 2 and four hours. Cooking time depends on the amount of bark, the concentration of the lye solution and other factors.
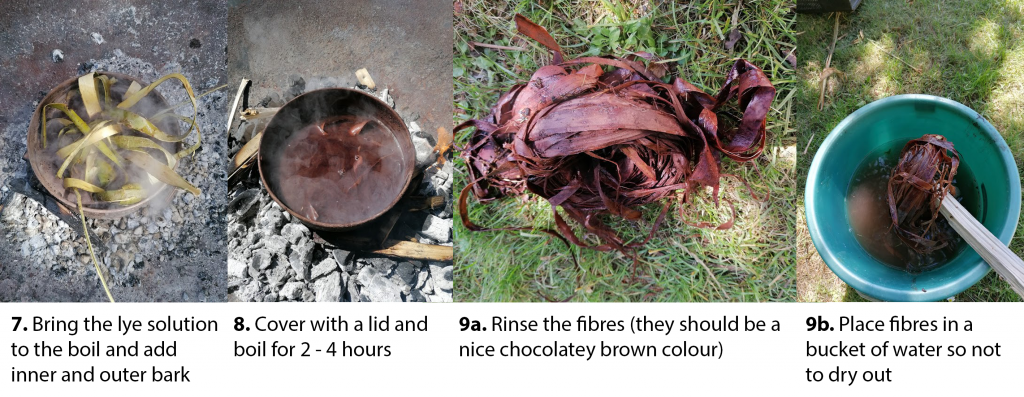
In this case the fibres were supple enough after 3 hours.
9. Rinse the fibres off (they should be a nice chocolaty brown by now), and keep them in a bucket of water. Don’t let them dry out.
Softening the fibres:
10. Now we have supple fibres, that still have thin layers of bark on them that we don’t want.
When the fibres dry out these layers will harden and make our cordage stiff, or worse: brittle.
We will now wet scrape them. Take a sharp, thin knife and run it along the whole length of the strips. Think curling ribbons for your Christmas presents. Notice the goo and dirt that comes off it? That ends up in a lot of people’s cordage.
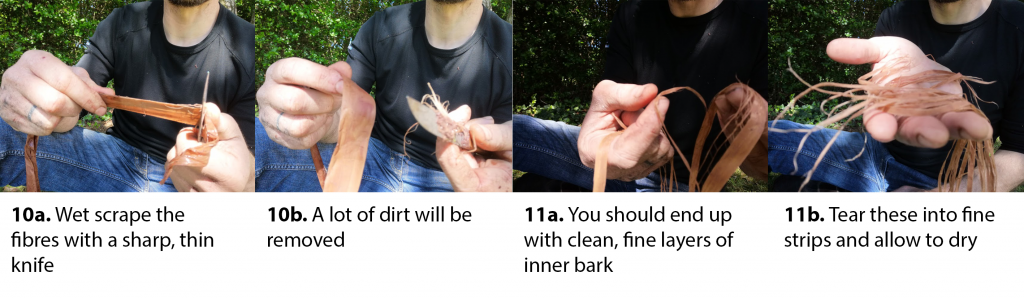
11. After a while you end up with just one very clean, fine layer of inner bark. Tear it down the length in fine strips and let them dry for a bit. They will dry really fast and feel like fine paper.
Making into cordage:
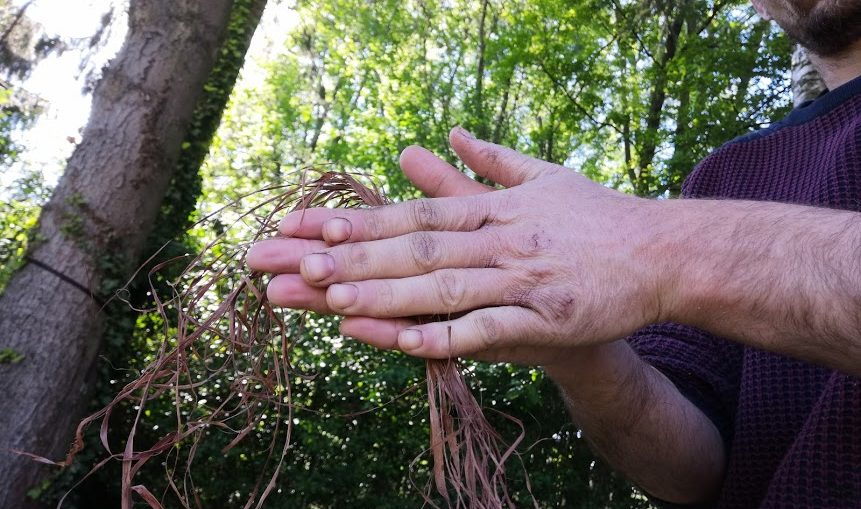
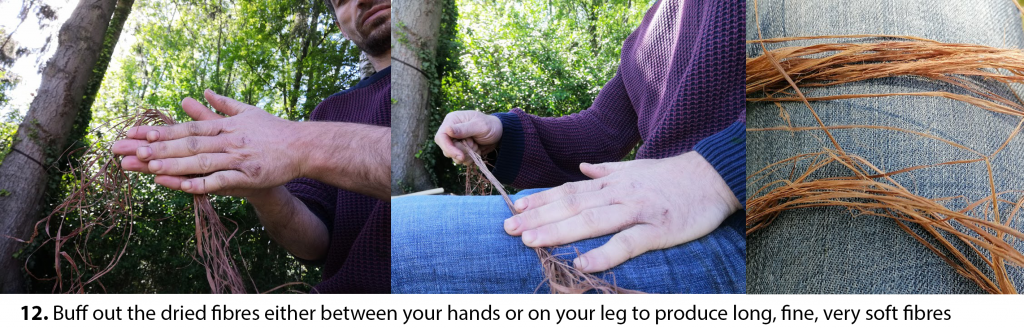
12. Last step for having long, fine and very soft fibres is buffing up the dried-out fibers in between your hands. Alternatively – I use both methods – you can rub them over your pant leg.
13. All that is left now is making the cordage. I prefer the method of thigh rolling. All the ins and outs of that method will be explained in another article down the line. But here you can see the process and about a metre of supersoft, very strong finished cordage.

About Bert Blancke

Bert Blancke is a hobbyist with an obsession for cordage and friction fire.
Visit Bert’s YouTube channel Fire & Fibers. A video detailing how to make willow bark cordage will be up there soon.

One thought on “Make Willow Bark Cordage”