
Resisting Invasion: The Molotov Cocktail
As preppers, we generally prepare for situations in which there are food shortages and disruption to electricity supplies amongst others. These may arise as a consequence of extreme weather conditions. Some preppers prepare for more malicious situations, such as invasion. Countries such as the USA enable much better armed response to such an event. The right to bear arms may be a contentious issue but recent events in Eastern Europe may change some attitudes.
Ownership of firearms is very limited in countries such as the UK. Within Scotland, even ownership of an air rifle or pistol requires a certificate. So, what resistance to an armed invasion such as that of Ukraine by Russia could we provide?
Part of Ukraine’s response has been to give weapons to civilians. Another has been to encourage the use of petrol bombs aka Molotov cocktails. Whereas an assault rifle may be complicated to maintain, a petrol bomb is simple to make and use. I first made and used such a weapon whilst serving with the British Army. The Whinny Hill complex at Catterick is designed for OBUA (operating in built up areas) and proved an excellent location for such training.
History of the Molotov cocktail
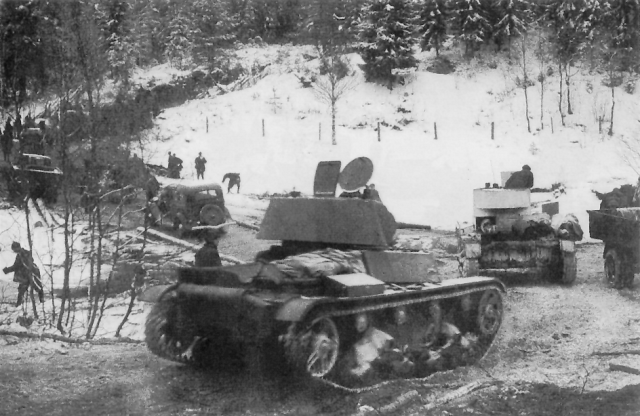
Contrary to what many believe, the name Molotov cocktail was first coined by the Finns, not the Russians. Soviet tanks rolled in to Finland in 1939 during the Winter War. The voice of Soviet Foreign Minister, Vyacheslav Molotov, was broadcast on the radio. He declared that aeroplanes flying over the country were not bombing missions. Instead they were “dropping humanitarian food deliveries.”
In response, the Finns made petrol bombs which they named after him. Furthermore Molotov ‘cocktails’ would accompany the alleged food parcels very well. With these easily made and improvised weapons, the Finns firebombed the invading tanks.
Petrol bombs had been previously used in warfare during the Spanish Civil War. This was only a few years before the Finland invasion. However, the name ‘Molotov cocktail’ has become the popular term.
With the threat of a Nazi land invasion of the UK during World War II, preparations were made for instructing the general population on how to use petrol bombs against tanks. However, since the 60’s, Molotov cocktails have become a symbol of uprisings and revolution and have been used in many places around the world. Belfast, London, Paris, Nicaragua, Hong Kong. The list goes on and on.
But be warned. They are illegal to manufacture or use in many countries, including the UK and the USA.
The Ukraine conflict is a considerably different scenario. Resistance towards an aggressive invader has been sanctioned by the government. The country fights for its very existence as a self-governing, independent nation. In fact, even breweries there have changed production from beer to petrol bombs!
With the prospect of another world war, perhaps it is worth knowing how to make a Molotov cocktail.
How to make a Molotov cocktail
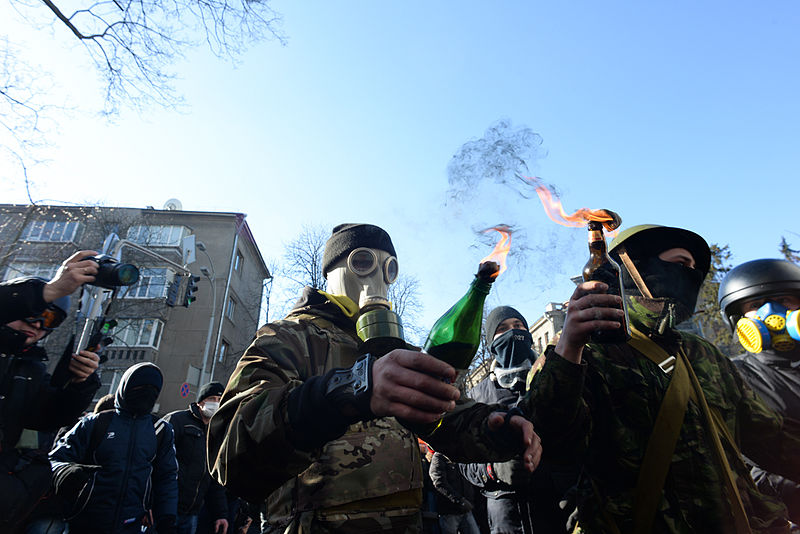
In its simplest form, a Molotov cocktail is a basic petrol bomb. It usually consists of a glass bottle part filled with petrol. A rag is pushed into the neck and acts both as a stopper and a fuse or wick. Petrol, bottles and cloth are generally easy to find so the Molotov cocktail is the ideal makeshift incendiary grenade.
Yet it’s not quite as simple as that as further improvisations have led to a more effective weapon. Let’s consider the different elements in a little more detail:
Casing
The casing or container is popularly viewed as a glass bottle such as that used for wine. In practice a jam jar would also do, as was often seen during the Spanish Civil War. Basically, any glass container that will easily smash when thrown at something will do.
Fuel
A variety of accelerants can be used. Petrol (gasoline), kerosene or any other flammable liquid is suitable. Alcohol can be used but it’s not ideal unless it’s around 100 proof!
Although this type of incendiary will cause problems, the liquid will spread. Consequently, damage is limited. To be more effective against vehicles, add something that will make the mixture more gelatinous. The Finns used roofing tar. In effect, this results in a napalm-like mixture.
However, in a SHTF situation, you can only use what is available. Items such as sugar, jam and polystyrene are ideal. Because they maintain a very high temperature, an intense heat will stick to the impact area. This also prevents the liquid spreading. If this impact area is the engine area of a vehicle, the likelihood is that the engine will overheat. Consequently, the vehicle will be disabled. Ordinary vehicles could be completely devastated by fire. This has proved effective against military vehicles in the past. More modern military vehicles are generally better armoured. Molotov cocktails aren’t likely to stop these and, especially, tanks. Having said that, rubber tyres will melt!
Fuse/wick
This is generally a rag that is stuffed tightly into the opening of the casing to form. Manmade fabrics aren’t ideal as they don’t light as well as natural materials. When the casing smashes, the fuel is released and comes into contact with the lit fuse. This causes the ignition. Other methods include chemicals. Usually this would mean mixing an alkaline substance such as potassium nitrate with the fuel. An acidic compound such as sulphuric acid would be absorbed into the rag on the outer. When the two come into contact, the chemical reaction would provide enough heat to ignite the petrol.
Because the ignition is based on contact between the fuse and the fuel, a rag isn’t the only method that can be used. A stormproof match, often used by campers etc, can be taped to the outer of the casing. The match is ignited with a striker and will burn for up to 20 seconds.
Improvisations
Dissolving items such as polystyrene, bits of rubber or swarfega in the petrol causes the liquid to stick to the target.
The addition of sugar or soap flakes improves can improve burning characteristics.
Items such as nails or heavy objects can be added. This can improve ballast to help flight when thrown.
Reality of the situation
There is a saying in the military that ‘no plan survives contact’. This means that no matter how well you prepare for something, once you face the situation for real, things won’t necessarily go smoothly. ‘Contact’ in the military sense refers to coming under enemy fire. A civilian in a city that is undergoing an artillery bombardment is certainly in such contact.
In the case of an invasion and being under artillery or infantry attack, it will be difficult to access what would normally be considered everyday items. Having a stock pile of petrol bombs might seem like a good idea. However, petrol does not keep well for long periods so the effectiveness of them could seriously dwindle.
Again, using Ukraine as an example, the signs of an invasion were evident for some time. This would give time to prepare.
- Fill your petrol cans.
- Collect casings (bottles and jars with lids).
- Gather together suitable fuse/wick material (cloths, stormproof matches etc).
- Store additional mix ingredients (such as jam, sugar, tar.
- Have a plentiful supply of lighters.
Back in 1939, The Finns discovered that using the stormproof matches as the fuse was more effective, and safer for the thrower, than using a rag. Throwing petrol bombs can be very risky for the thrower, especially when tensions are high.
Hopefully you will never have the need to use them!
